|
|
|
|
Lincoln Rear Disc Brakes |
Last Revised: 10 May 2004 |
|
|
|
|
Lincoln Rear Disc Brakes |
Last Revised: 10 May 2004 |
 |
The Lincoln Mark VII Rear Disc Brake swap fits
the bill when looking for an economical DIY rear disc install. The mod is relative
simple, all parts are readily available between auto salvage parts and
new parts from your local parts store and, with the bracket kit from
Ultrastang.com, it becomes an easy swapout.
Special Credit goes to UltraStang for his well designed installation. This page is an addendum to the Rear Disc installation page on WWW.Ultrastang.com. Conversations with Steve Ainsworth are usually available on the FYI-Ford MustangSteve Message Board. Rear Brake Section of the Lincoln Mark VII Factory Shop Manual |
| Rear disc brakes are not a necessity,
so why change? Rear drums, especially large drums off trucks,
provide large amounts of binder strength. So why
change?
Rear Discs are exceptional for their stopping power. They are actually less complicated than drum brakes, and resist fading when driven hard, especially under track conditions. Rear discs are preferred for track cars, and most modern cars have 4 wheel disc brakes. |
 |
![]()
This list was compiled from various sources, so the prices are not absolutes. They are, however, fairly close and will give you a good place to make a call on what items you should try to salvage and which are not worth messing with.
| Item | Cost | Notes |
| 66 Axle housing | Gimmie | Mr. Tim's hand-me-down |
| 3.55 Diff | $150.00 | Swap Meet contact |
| Axles | $40.00 | E-Bay |
| Rear Center hose | $22.00 | |
| Axle Gaskets | $5.00 | |
| Corvette Master Cylinder | $25.00 | E-Bay |
| Brake Lines | $10.00 | |
| Ultrastang Install Kit | $100.00 | Includes brackets, bolts ring spacers, and Instructions |
| Lincoln Brakes (Used) | $150.00 | Caliper Cores worth $ 160 |
| Rebuilt Calipers | $98.00 | Autozone |
| New Rotors | $120.00 | Autozone has one number for both sides |
| Brake Shoes | $20.00 | |
| Caliper Bolts | $10.00 | Preventive Safety action |
| Caliper Hoses | $50.00 | Left and right are different (Had to order) |
| Total (Brakes Only) | $550.00 | Rear Kits cost $750 and up. |
![]()
What to do... It all depends on the condition of the salvaged items, and your confidence/abilities/ experience in vehicle maintenance. I gave $150 for the take off assembly, and considering I got the dust shield, caliper attach bracket, calipers, rotors and E cables, I consider that a good deal. Calipers are relatively simple to over haul if you have the know how, but for novices, you may feel safer investing in fresh ones for less that $100. Rotors have a minimum thickness dimension and the refurbisher, for liability reasons, will not grind them down past that point. They can be expensive to replace. Hoses are a no brainer. Replace them.
![]()
Rule of the day: SAFETY! You are working with a 'safety of flight item' for your car. It is mandatory that this be done correctly and safely. You will be putting yourself at risk by working under the car. You will be driving at high speeds and will have passengers in your car, as well as ME in the oncoming traffic lane. Do not attempt this if you are not completely comfortable in your knowledge of vehicle maintenance. I ASSUME NO RESPONSIBILITY FOR WHAT IS PROVIDED HERE. THIS SITE IS FOR INFORMATION PURPOSES ONLY. DO THIS MOD AT YOUR OWN RISK! (Have I left out any other disclaimers?) All kidding aside, this is not swapping headlights or steering wheels....this is SERIOUS SAFETY stuff. The actual step by step is provided at www.ultrastang.com for this installation. The information below is provided as secondary comments on an actual recent installation of the Ultrastang kit.
![]()
|
The anemic
2.79 gears just never worked with the 5 speed. At 60 mph, it was too
fast for 4th gear, but was not ready for 5th. The engine
barely made 1000 RPS and had no torque. Overdrive didn't come into use
until 75+.
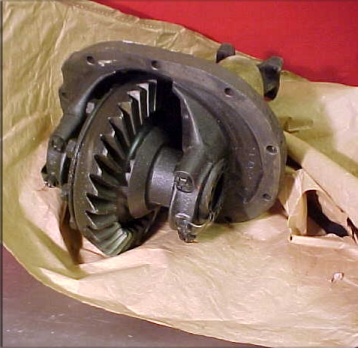
So, enter a new pumpkin. Although not a posi, this assembly with 3.55 gears should fit very nicely behind the 5 speed. 3.55's are basically what Mustangs of today use. |
| The Lincoln Mark VII rear disc brake components. This set was bought from a wrecking yard. The main items you're after are the caliper attach bracket and the dust shield. The other parts (calipers and rotors) can be bought from any auto parts store...however... they are very expensive and the cores for the calipers list at Autozone at $80 EACH. | 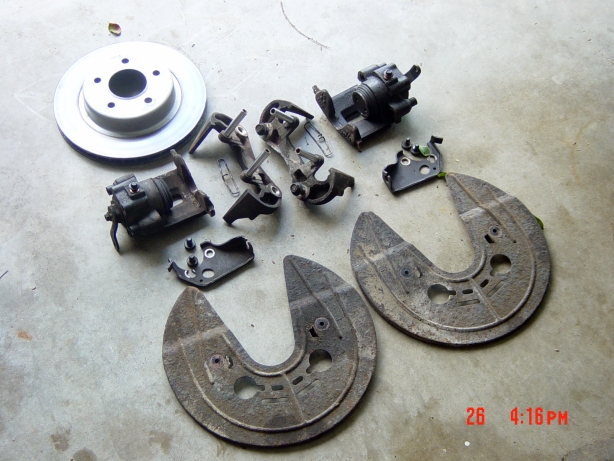 |
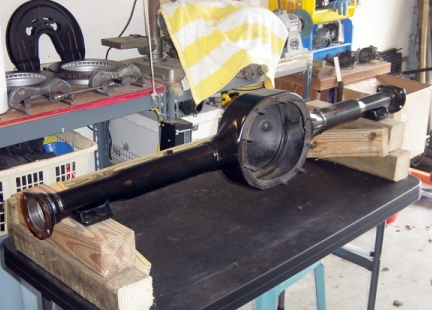 |
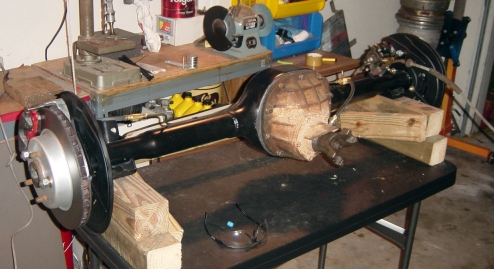
The beginning. A clean and freshly painted 8" housing. Which, of course didn't stay that way after I spilled brake fluid all over it....but hey. It repaints.
|
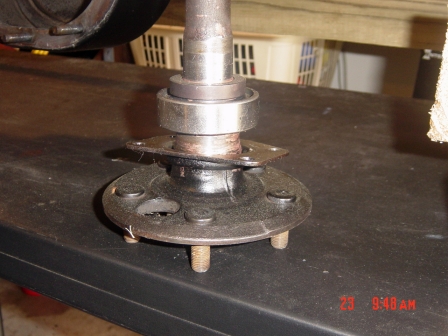
| When ever
assembling a rear, take the opportunity to make sure the wheel bearings
are in good shape and the axle seal surface is smooth.
Shown right are 8" Ford axles with new bearings installed and seal surface honed. |
 |
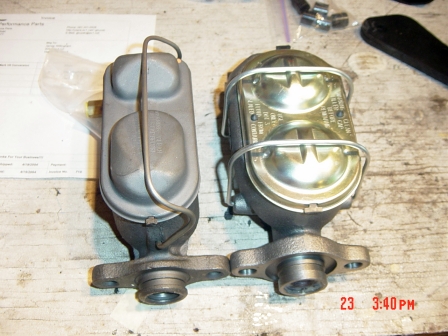
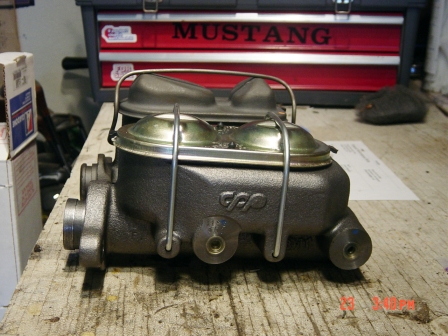
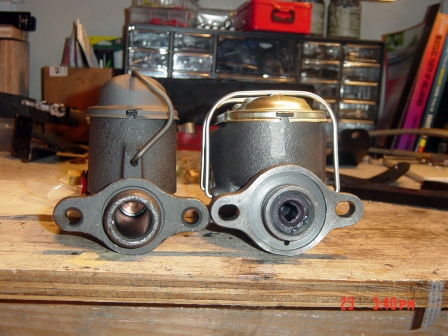
| The surrounding three photos are of the replacement master cylinder I used when going to 4 wheel discs. The one on the left is the 74 Maverick unit for manual brakes which was replaced. The unit on the right is a Classic Performance Products' Corvette style master cylinder for 4 wheel discs. Note in the lower right photo how the bolt holes are slotted to take either Ford or Chevy applications. This unit can be used for either manual or power brakes, and has ports on either side. |
|
|
|
|
|
|
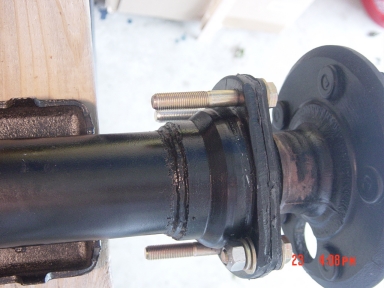
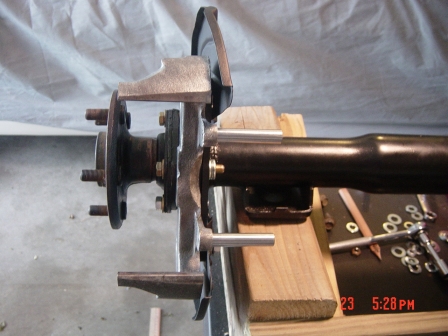
Utrastang
Mark VII Brake Install begins with the installation of the spacer plate
between the axle house and the axle cover plate (to make up for the
removed item), and install of specific bolts in specific locations
per the procedures. You will have to remove the axles or cut the
supplied plates to fit around the axles.
It's now ready for installing the spacers and mounting the caliper attach plate. |
| Next, the caliper attach plate is positioned and the dust shield is fitted to the bolt holes and drilled to align with the plate. | 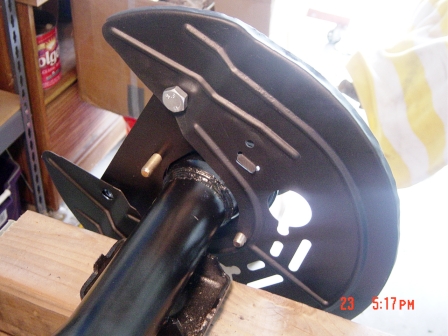 |
 |
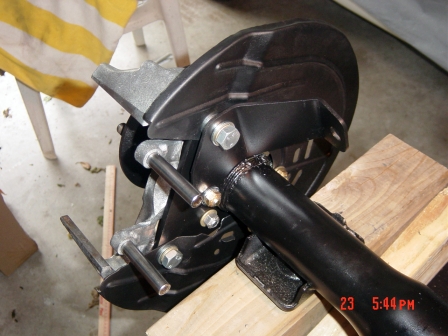
This view
shows the dust shield, caliper attach plate, and caliper holding bracket
assembled and aligned. Spacing is determined by the supplied
spacers, and various combinations of washers supplied with the kit.
Specific details are explained on Steve Ainsworth's webpage. www.ultrastang.com
|
| The backside
view, showing the Ultrastang kit installed with the caliper attach plate
and E-Brake bracket installed. This only needs the caliper and shoes to be complete.
|
 |
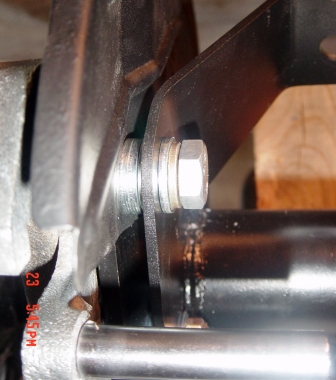 |
Close up view of how the various brackets use supplied washers to align perfectly. |
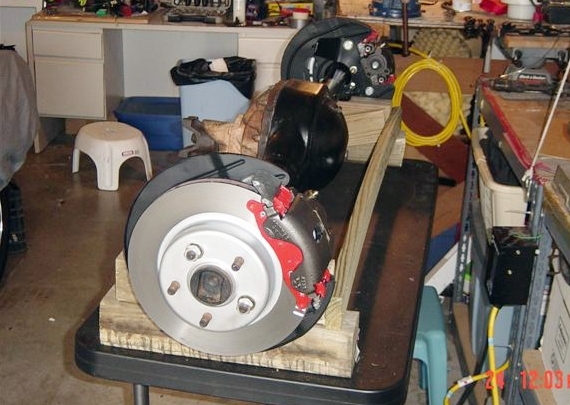
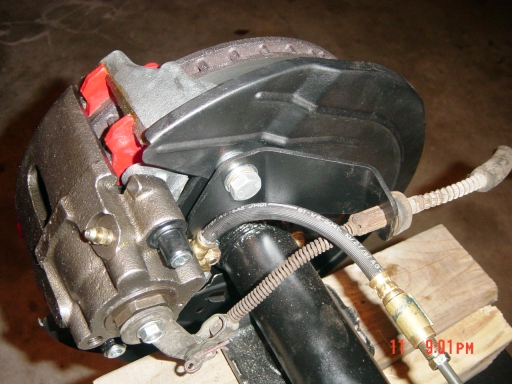
| A pair of photos
showing the completed assembly with rotors, calipers, shoes, E-Brake and
plumbing installed. (The brake lines were subsequently rerouted off
center of the shaft during installation when they were found to interfere with the axle
bumpers.)
Read the Lincoln Manual Brake Section and use it to make the final adjustments of the Calipers. They need to be set between a min/max against the rotor. Failure to do so can cause you problems later on. You will also need this manual when setting up the E-Brake. |
|
 |
 |
|
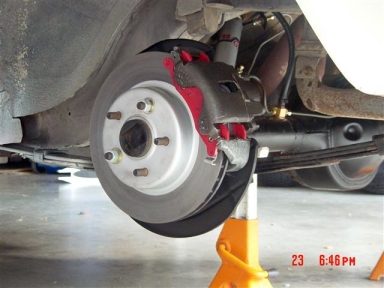
The Completed Assembly. The Rotors were cleaned, painted, then taken to a local Auto parts store for resurfacing. Note the spacer ring installed between the axle hub and the rotor. It fits perfectly. |
|
|
|
|
| Too many pics make a slow page....please click for Page 2. | |